Wednesday 11 December 2013

Mince Pies


What would a baking blog be without that quintessential Christmas treat: mince pies? These little beauties may not look like the most spectacular pies in the world, but the pastry is so light and buttery that it literally melts in the mouth, revealing the rich flavours of mincemeat within.

This recipe has been in my family for generations, and I think I can just about do it with my eyes closed now. Making the perfect pastry is really very simple if you just follow this guide step by step; remember not do use too much water and not to overwork the dough.

I always use shop bought mincemeat to avoid the hassle of making my own, but do feel free to make it! After experimenting with a variety of different mincemeats (my family eat a LOT of mince pies), my favourite is Tesco's Finest, although the Co-Operative mincemeat is also yummy. If you fancy something a bit boozier, than Sainsbury's Taste the Difference do an amazing one, packed with port and sherry. Avoid Robertson's however, its far too runny.

Ingredients:
For the pastry:
10oz flour
7oz unsalted butter (plus extra for greasing)
1oz of caster sugar
For the filling:
1 Jar of mincemeat of your choice

Method:
Begin by greasing some fairy-cake tins with butter.This recipe usually makes 12-14 mince pies. Grease each hole thoroughly with the same butter that you intend to use in the pastry. Set aside.

To make the pastry. rub together the butter and flour between your fingertips until it resembles breadcrumbs. (Tip - shake the bowl to make any large chunks of butter come to the top, then rub them in.) Stir in the caster sugar.


Add a little water, then stir. Repeat this until the dough comes together, then use your hands to bring it together into a ball. This should take about 2 tbsp of water. You don't want the pastry to be too sticky or too crumbly, so add the water slowly.

Once you have formed the dough into a ball, wrap it in clingfilm and put in the fridge to rest for half an hour.


Preheat the oven to 180 degrees Celsius (fan.) Remove the pastry from the fridge and divide into two with a sharp knife. Place one half to the side (NOT back in the fridge).

Roll out one half of the dough until it is 3-4mm thick. Again, use your judgement here; a pastry that is too thick will not cook thoroughly. Using a large fluted cutter, about the same size as the fairy-cake tin holes, cut out the bases and use them to line the fairy-cake tin.


Fill each pastry base with a generous teaspoon of mincemeat, but not so much that it spills over the edge! Wet the edges of each pastry case with a little bit of water.


Next, roll out the next batch of dough to the same thickness. Using a slightly smaller fluted cutter, cut out the lids to the pies and place them on top of each individual pie. Press down lightly at the edges. Using a sharp knife, poke two small holes in the top of each pie.


Bake in the preheated oven for 18-20 minutes, they should be a pale golden brown. The moment you remove them from the oven, sprinkle them generously with caster sugar and leave to cool in the tin.

When the mince pies are completely cool, give the tin a few sharp taps, and using a palette knife remove them from the tin.

Enjoy cold, or warm up with 10 seconds in the microwave and serve with a dollop of cream or vanilla ice-cream. Merry Christmas!

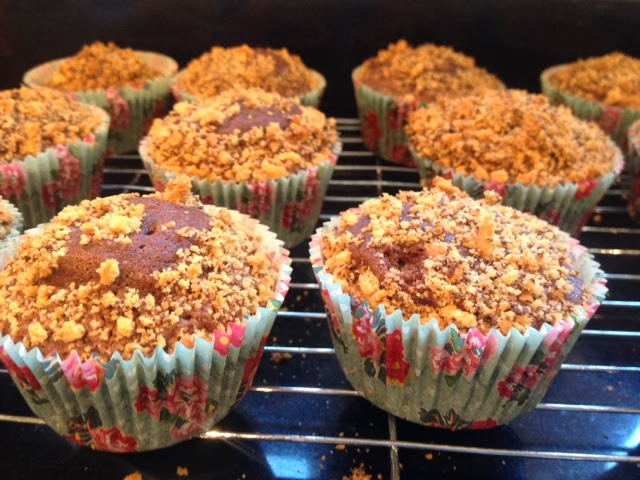
If you fancy something equally as festive but slightly different, then check out these Christmas Spice Cupcakes. 

Monday 2 December 2013

Christmas Spice Cupcakes


Yes, I know it's only December 2nd. Here at Oxford though, things started getting Christmassy a long time ago. We celebrate "Oxmas" on the 25th November every Michaelmas. A fair amount of outrageous Christmas jumpers can be spotted around college, we all exchange secret santa gifts, drink copious amounts of mulled wine and eat a beautiful Oxmas dinner in our stunning 15th century hall. All pretty picturesque, really.

Oxmas and Christmas are nothing however, without ridiculous amounts of cake! And so, on Saturday of 7th week I journeyed home, purely to spend a day in the kitchen baking everything Christmassy imaginable. What I made this term will come soon, however for now have these Christmas Spice Cupcakes!

.I made these at Christmas time last year (hence the lack of pictures; I wasn't a blogger then!) for my sister to take to a staff do - needless to say my parents watched her drive away with them with heavy hearts.

This recipe is one of my own (not Mary's, for once!) and I was super pleased with the way it turned out, so with Christmas just around the corner, why not whip up a batch for your family and friends to enjoy?

150g butter, softened
150g soft brown sugar
150g self raising flour
3 eggs
1 tsp ground ginger
1 tsp ground cinammon
1/2 tsp mixed spice
40g natural yoghurt (I use Yeo Valley)
150g butter (for icing)
300g icing sugar (for icing)
120g light brown sugar (for toffee sauce)
200ml double cream (for toffee sauce)
60g unsalted butter (for toffee sauce)
1 tbsp golden syrup (for toffee sauce)

Preheat the oven to 180 degrees Celsius (170 Fan) Line a muffin tin with cupcake cases.

Beat together the sugar and the butter. Beat in the eggs, one at a time. 

Sift together the flour, cinnamon, ginger, mixed and mixed spice. Sift into the butter and egg mixture and gently fold in until all is incorporated. Fold in the natural yogurt. 

Spoon into cupcake cases until they are 2/3 full - be careful not to over fill, you don't want the mixture to bubble over the edges and burn. Bake in the preheated oven for 15-20 minutes.

Whilst the cupcakes are baking, make the toffee sauce. Heat the sugar, butter, cream and golden syrup in a medium pan over a medium heat until it is thick and dark brown colored. The sauce should be bubbling slightly but not boiling. Remove from the heat.

Next, make the icing. Beat together the butter and icing sugar. Beat in a little of the toffee sauce, but not so much that the icing becomes ready. It needs to be thick enough to pipe. 

When the cakes are golden brown and spring back to the touch, remove from the oven, transfer to a wire rack and leave to cool completely before icing. When ready to ice, spoon the butter icing into a piping bag with a star shaped nozzle and pipe in swirls on top of the cupcakes. Next, spoon the cooled toffee sauce into a piping bag, snip a small hole at the end, and drizzle over the cupcakes. 

Share with loved ones beside the Christmas tree :)


Christmas Pudding decoration and sprinkles from Lakeland.
I think its fair to say my blog has become rather cupcake dominated, I just gain immense satisfaction from making these pretty little beauties. I'll try and vary things up a little bit soon though; expect mince pies and christmassy cookies!

Oxmas/Christmas love to all x

PS These snickerdoodles are also pretty darn Christmassy, and perfect with a glass of spicy mulled wine.

Tuesday 19 November 2013

S'mores Cupcakes


After a very long (unplanned) break from blogging i'm back on it, and this time I'm bringing you a deliciously decadent bonfire treat: s'mores cupcakes.

Yes, I do realize that bonfire night was rather a while ago now.. unfortunately however, being a student means I have various other commitments to fulfill. The past few weeks have shot by in a haze of essays, Old English translations, coffee breaks, Ball Committee meetings, and nights out, all which make for one very tired (but very happy) Leah.

Thus I sit, on this rainy Tuesday of 6th week, in my room at Lincoln College (well, opposite Lincoln college in the eponymous Mitre, an impenetrable labyrinth of student rooms and somewhat strange odours..), a cup of miso soup at my side, finally writing this blog post.

And there's really no reason why s'mores cupcakes should only be baked for bonfire night anyway - every occasion is a biscuit-marshmallow-chocolatey-goeey-goodness occasion!

Ingredients:
For the sponge:
30g dark chocolate, chilled
5 digestive biscuits
80g unsalted butter or margarine, softened
280g caster sugar
200g plain flour
40g cocoa powder
1 tbsp baking powder
1/4 tsp salt
2 large eggs
240ml whole milk
For the topping:
200g caster sugar
4 egg whites
100g dark chocolate
An abundance of mini marshmallows.

Method:
Preheat the oven to 170 degrees Celsius and line a muffin tin with muffin cases. Use a grater to grate the chilled chocolate, then set aside. Crush the biscuits in a food processor (or violently with a rolling pin).

Using a hand-held electric whisk, beat together the butter, sugar, flour, cocoa powder, baking powder and salt until they resemble fine breadcrumbs.


Mix the eggs and milk by hand in a jug, then pour 3/4 of this mixture into the dry ingredients and beat with the hand-held electric whisk until smooth. Add the rest of the milk and eggs and continue beating until all is well incorporated; be sure to scrape down the sides of the bowl with a spatula!

Fill each paper case two thirds full of batter. Sprinkle the chocolate shavings and the crushed biscuits on top of the cupcakes. Bake in the oven for 18-20 minutes until risen and springy to the touch. Leave to cool slightly then remove from the tin and place on a wire rack to cool completely before frosting.


Put the sugar in a small saucepan with 150ml of water and bring to the boil. Meanwhile, using a free-standing electric mixer, whisk the egg whites until foamy.

When the sugar has reached the soft ball stage, pour onto the beaten eggs while beating on a medium speed. Be careful: do not let the hot sugar mix touch the mixers and flick everywhere as it will be very hot! Once added, turn the speed up to high and whisk until the underside of the bowl is lukewarm. The meringue should have increased in size (a lot) and become white, smooth, and shiny.

Smooth the meringue on top of the cooled cupcakes. Top with mini marshmallows and a square of dark chocolate, then swirl about using a palette knife. With a cook's blowtorch, lightly brown the meringue to give it a baked appearance; the marshmallows will go all gooey and melt into the meringue. Yum. To finish, sprinkle over some remaining biscuit crumbs.

*NB - It is advisable not to blowtorch your own wrist while doing this.. it hurts. A lot.*


And then, share with your friends (or not) and sit around feeling incredibly happy! Despite the tears and pain involved in making these, and the fact that I subsequently had to wear a large bandage around my wrist for a good two weeks, it was well worth it. They're simply amazing.

Friday 11 October 2013

Lemon Meringue Cupcakes


This post is being written only a week too late; the last week or so has been a hectic mish-mash of dashing backwards and forwards preparing for university, and now I am finally back here again, in the midst of collection revision chaos. There's no procrastination quite like blogging about cake.

Lemon flavoured cakes are coveted in my family, so needless to say my Mum was in no way impressed when I announced I was making these to take back to university with me. The recipe is adapted from the Hummingbird Bakery book.

A warning in advance: if you're prone to accidents (like me, actually!) I would think twice before attempting these as use of a blowtorch is involved. Myself and a blowtorch are probably just as about compatible as humanities students and early mornings... somehow though, I managed not to burn down the entire neighbourhood. The result was these moist lemon sponges, filled with zesty lemon curd and topped with sweet and crispy meringue.

Oh, and another apology is warranted: this post is severely lacking in pictures due to my highly distracted state of mind whilst making them. Despite being in the kitchen, my mind was with the dreaming spires, and less romantically, the impending thought of an Old English grammar test...

Ingredients:
80g unsalted butter
280g caster sugar
240g plain flour
1 tbsp baking powder
1 tsp finely grated lemon zest
2 tbsp lemon juice
2 large eggs
240ml whole milk
For the filling and frosting:
200g caster sugar
4 egg whites
100g lemon curd

Method:
Preheat the oven to 190 degrees Celsius (170 for fan ovens) and line a muffin tin with cases.

Using an electric whisk, beat together the butter, caster sugar, flour and baking powder until it forms fine breadcrumbs. Beat in the lemon zest.

Whisk together the eggs and milk in a jug and gradually beat into the dry mixture. Add the lemon juice and beat well, until all the ingredients are well incorporated.

Spoon the batter into the paper cases, until each is about two third full. Bake in the preheated oven for 18-20 minutes (mine took 21 minutes) and leave to cool completely before decorating.

When cool, use a sharp knife to take the centre out of each cupcake. Fill this hole with lemon curd, then trim the part of the cupcake you took out and replace ontop of the lemon curd. (ie so you get a secret lemony surprise in the cupcake.)

To make the frosting, put the sugar into a small saucepan with a sugar thermometer and cover with approx 150ml cold water. Bring to the boil. Meanwhile, beat the egg whites in a freestanding electric whisk until just foamy.

Allow the sugar to boil for 10-15 minutes until it has reached soft ball stage (235-245 degrees Fahrenheit) then, with the mixer still running, pour the hot sugar syrup slowly into the egg whites being extremely careful not to let it touch the beaters, as this will cause it to flick everywhere (which will be painful.) When all the sugar has been added, turn the electric whisk up to high and continue whisking until the bottom of the bowl is lukewarm. The meringue should have quadrupled in side and be very shiny.

Top each cupcake with a generous amount of meringue, and then use a cook's blowtorch to brown it. If you do not have a blowtorch, pop them under the grill and keep a close eye on them.

Sunday 1 September 2013

Summery Plum Cupcakes


It's been a while since my last post due to an exceptionally busy summer; I've recently returned from one of the best weekends of my life at Reading Festival. However, a few much needed weeks of recovery at home has left me with plenty of time to bake.

These cupcakes were made for my Nanny to sell at a bake sale - i'm still forbidden from baking without an excuse to save the waistlines of my family! 

She needed something individual and seasonal, and these cupcakes instantly sprang to mind as perfect. The plum jam in the sponge makes it beautifully moist, and along with the sliced plum on top they make a perfect summer treat. 

Ingredients:
For the sponge:
120g unsalted butter
340g plain flour
1/2 tsp baking powder 
4 large egg yolks 
360g soft light brown sugar 
180ml buttermilk 
270g plum jam 
For the icing:
500g icing sugar
160g unsalted butter
50ml whole milk 
70g plum jam 
fresh plum slices, to decorate 

Method:
Preheat the oven to 190 degrees Celsius, and line a muffin tin with cupcake cases. 

Using a handheld electric whisk or free standing electric mixture with the paddle attachment, mix together the butter, flour, and baking powder n a low speed until the ingredients are well incorporated and crumb-like in texture.


In a jug, beat together the egg yolks, brown sugar, buttermilk and 120g of the jam until all the ingredients are combined. Add half of this mixture to the dry ingredients and mix well. Continue to add the remaining mixture, then increase the speed of the electric mixer to medium and beat until smooth. 

Fill each paper cupcake case up to one-third full with batter, then top with 1tsp of the remaining plum jam, followed by a similar quantity of batter.  The jam will create a filling as the cakes bake. 


Bake for approximately 20-25 minutes, or until the tops of the cupcakes spring back when you touch them lightly. Leave to cool slightly in the tins before removing and transferring to a wire rack to cool completely. 


To make the icing, beat together the icing sugar and butter on a low speed until fully incorporated and powdery in consistency. Pour in the milk and beat well, then whisk with an electric mixer until light and fluffy. Finally, stir in the plum jam by hand, ensuring it is evenly dispersed. 

Spoon the frosting onto the cupcakes once they are cold, gently smoothing and spreading with a palette knife. Decorate with slices of fresh plum. (NB - Do not try and pipe the icing - the jam makes it too soft and adding more icing sugar will make it too sweet.)


I'm "jetting off" to Cornwall next week for a much needed holiday with my family and boyfriend. Expect many "Cornish cream tea" related posts; I have a feeling this holiday may develop into a bake-a-thon with 10 hungry family members to feed! 

You may also like this Summer Berry Loaf Cake, perfect sliced up with a cup of tea. Heck, why not just make both?

Saturday 3 August 2013

Summer Berry Drizzle Loaf Cake


Sometimes, an irresistible baking urge will creep over me, and I am left with no choice but to bake. However, this means overcoming an annoying (all be it probably practical) rule put in place by my Mother to prevent me baking every single day; I am not allowed to bake without an excuse.

An excuse soon cropped its head up though, in the form of six hungry men doing a days work on a farm together. My Dad was more than pleased when I offered to bake a cake for him to take along, so I went for something simple and portable.

This cake definitely isn't a visual stunner, but it gets 10/10 from me for taste. Here's the recipe:

Ingredients:
175g very soft butter 
175g golden caster sugar
250g self raising flour 
2 large eggs 
2 tsp vanilla extract 
175g mixed summer fruits, stoned (I used strawberries, raspberries, blackberries, and a few cherries.) - I actually used closer to 275g and the cake turned out perfectly... 
140g granulated sugar 
1-2tsp lemon juice 

Method:
Heat the oven to 180 degrees Celsius (160 fan). Grease a 900g loaf tin and line the base and ends with a long strip of baking parchment.

Put the butter, sugar, flour, eggs and vanilla extract into a large bowl and beat with an electric hand mixer for 5 minutes until pale an creamy. The mixture will be very thick. 


Spread one third of the mix into the tin, then scatter over some of the fruit. Carefully dot and spread over another third of the mix, and scatter with some more fruit. Dot the rest of the mix over and gently spread with the bake of a spoon. You will have some fruit left but this will be used for the topping. Bake for 1 hour.


Remove the cake from the oven. Dot all over the top with a skewer. Put remaining fruit in a bowl with the granulated sugar and the lemon juice and mash/stir. Spoon over the cake. Leave in the tin until the cake is cool and the topping is set and crisp.


This is such a super simple summer bake that you really have no excuse not to bake it. Although I didn't get a chance to guzzle more than half a slice before my Dad whipped it away, I bet it would be beautiful with a dollop of whipped cream or creme fraiche.

Tuesday 30 July 2013

Orange & White Chocolate Cake


My Granny is one of the most lovely ladies I know. She has a heart of gold and I think each of my four sisters would agree with me when I say she's the best Granny we could ask for; she never forgets a birthday, sends me the loveliest cards before every single one of my collections at university, and I frequently open my inbox to find a chatty email from her. (Yeah, she's completely down with the text and internet thing too - 21st century Granny!)

I also know that she is one of my most dedicated followers (Hi Granny!), and for that if nothing else she deserves a marvelous birthday cake! I fancied baking a cake a little lighter than my previous two monsters (Lime & Pistachio and Chocolate Honeycomb). This cake seemed perfect: light and refreshing, just what we needed after a delicious lunch at a local French-style cafe.

This recipe, with some minor alterations, is from The Clandestine Cake Club Book. I used my neighbour's chickens freshly laid eggs for extra freshness. There's nothing like baking with eggs quite that local!

Ingredients:
225g butter, softened
225g caster sugar
4 large eggs, beaten
225g self raising flour
zest of 1 large orange
1/2 tsp baking powder
1 tbsp milk
icing sugar, to dust
orange slice, to decorate
(I also added a teeny weeny bit of orange juice, and a drip-drop of vanilla essence)
For the orange syrup:
grated zest and juice of 1 large orange
1 tsp orange blossom water or 2 tsp Cointreau
1 tsp caster sugar
For the white chocolate icing:
150g white chocolate
grated zest of 2 large oranges, plus 4 tbsp juice
200g butter, softened
75g icing sugar

Method:
Preheat the oven to 190 degrees Celsius (fan 170). Grease and line two 20cm round sandwich tins.

Beat the butter and sugar until light and fluffy, then add the eggs gradually, beating well after each addition, and adding a tablespoon of flour with the final addition to help prevent curdling. Mix in the orange zest, then fold in the remaining flour and the baking powder until thoroughly combined. If the mixture looks a little stiff then add a little milk.  (I didn't need to as I added some orange juice.)


Divide the mixture between the tins and bake for 20-25 minutes (mine took 25 mins but it completely depends on your oven.) Leave in the tins to cool slightly.


Meanwhile, make the syrup. Put the orange zest, juice, orange blossom water, and sugar into a pan over a low heat and stir until the sugar has completely dissolved, then bring to a simmer. Remove from the heat and leave to cool a little. Turn the cakes out of the tins onto a wire rack, then spoon the syrup over the two sponges. Do not over soak them - you may not need all the syrup. Leave the cakes to cool completely.


To make the chocolate filling, place the chocolate in a heat proof bowl. Put the orange zest and juice in a small saucepan and bring to the simmer. Simmer for a couple of minutes, then pour over the chocolate. Stir until thoroughly combined and the chocolate has completely melted. If it does not fully melt, set the bowl of chocolate mix over a pan of simmering water and stir gently. Set aside to cool COMPLETELY. 


In a separate bowl, beat the sugar and icing sugar until light and fluffy. Gradually add the COLD chocolate, beating all the time, until thoroughly combined. (BE WARNED: IF THE CHOCOLATE MIXTURE IS STILL WARM IT WILL MELT THE BUTTER AND THE MIXTURE WILL SPLIT!!)

Sandwich together the cooled cakes with the filling, then dust the top with icing sugar and decorate with a slice of orange.

Here's a picture of Granny herself cutting a slice of cake. The sponge was beautifully soft and fluffy, a darn good bake even if I do say so myself! It was just the right way to end a very happy day.


If you like the look of this but fancy something a little more exotic, then try this Passionfruit Cake for an equally refreshing summer treat. 

Saturday 27 July 2013

Macaroons

CAN SOMEONE PLEASE TELL ME HOW TO GET RID OF THIS GINORMOUS GAP?! Will pay in baked goods.


My parents have abandoned me this weekend to visit some family friends, leaving me with only three dogs and a baking cupboard full of supplies. I suppose being home alone means i'm supposed to secretly throw some sort of crazy party. However, i'd simply rather just bake. So bake I did.

I've been attempting to master macaroons for a fair time now, however no attempts thus far have been bloggable. So when I spotted a recipe in this month's edition of Woman & Home's Feel Good Food, it just had to be the one I dedicated my home alone time to.

The recipe makes about 30 macaroons, half with a salted caramel filling and half with a pistachio buttercream. 

Ingredients:
3 large egg whites
65g granulated sugar 
2 drops vanilla extract
150g icing sugar, sifted (MUST be sifted)
85g ground almonds 
For the salted caramel filling:
225g dulce de leche or Carnation Caramel
1/2 tsp sea salt
For the pistachio buttercream:
50g unsalted butter
85g icing sugar
50g ground pistachios
2 drops green food colouring (optional)
2tbsp milk

Method:
Whisk the egg whites with an electric whisk until stiff. Add the granulated sugar in two batches, whisking between each addition. Add the vanilla, whisk until stiff. 


Add the icing sugar to the almonds and sift half into the egg whites. Fold in with a spatula, then sift in the rest of the mixture and fold in, until the mixture is glossy and drops off the spatula when lifted. 

Transfer to a piping bag and pipe 3cm diameter circles leaving gaps between them. (It helps to draw out the circles on the baking parchment first.) Rap the bottom of the trays sharply on the kitchen surface, then rest somewhere to dry for one hour. Do NOT put them in the fridge. 


For the fillings, combine the dulce de leche/Carnation Caramel with the salt, then transfer to a piping bag and rest in the fridge. Beat together the pistachio buttercream ingredients and then add the food colouring. (When I first added my colouring I regretted it as it immediately became bright green, but it actually looks great when sandwiched between the macaroon shells!) 


Heat the oven to 190 degrees Celsius (170 fan). When the macaroons have hardened and their shells are no longer sticky to the touch, place in the middle of the oven on top of a second tray to protect their bottoms from burning. Cook the macaroons for 10 to 12 minutes. They should have risen and be glossy on top, with a bubbled rim on the bottom known as the "foot." Remove from the oven and allow to cool completely before removing from the baking parchment. 


Fill half the macaroons with caramel and half with the buttercream. They're best served on the day they are made, but will keep for 3 days in an airtight container. 


If you've never made macaroons before I urge you to try this recipe. It was really super simple. Next time I think i'll make the caramel myself and beat it into a buttercream; I don't like the taste of Carnation Caramel very much! 

Happy baking! :) 

Sunday 21 July 2013

Salted Caramel Truffles


(Please excuse the ginormous gap at the opening of this post, I am on the verge of having a blogspot induced nervous breakdown where formatting is concerned.)

Courtesy of Edd Kimber's beautiful book "Say It With Cake", these truffles only served as fuel to my current salted caramel addiction. They were requested by my sister especially to top her Chocolate Truffle and Honeycomb Cake, the recipe for which will be up soon! 

They come with a warning though; it is hopelessly difficult to bake anything with salted caramel in it without devouring all the caramel before actually using it... and consuming one's body weight in salted caramel can't be healthy. 

Here's the recipe:

Ingredients:
300g dark chocolate 
300g caster sugar 
300ml double cream
1/2 tsp vanilla extract
20g light brown sugar 
20g unsalted butter 
1/2 tsp flaked sea salt 
cocoa powder, for dusting 

Method:
Put the chocolate in a medium heatproof bowl and set aside. Put the caster sugar in a medium pan over medium heat and leave until the sugar begins to dissolve and caramelize around the edges. Using a silicon spatula, drag the dissolved sugar towards the middle to help it dissolve evenly.

Once the sugar is fully dissolved and has turned a dark golden brown colour, pour in half the cream, and all the vanilla and light brown sugar, it will bubble up furiously, so be careful and go sl
owly. Once the bubbling has subsided, add the remaining cream. If the caramel is lumpy, put over a low heat and allow to melt. Once you have a smooth caramel, add the butter and sea salt, and stir gently to combine. 

Pour the hot caramel over the chocolate and stir gently to combine. Chill until firm enough to roll into balls. 

To make the truffles, have a small bowl of cocoa powder ready and a baking tray lined with baking parchment. Take large teaspoons of the ganache mixture and roll into balls, then roll in the cocoa powder and set on the baking tray. Chill the truffles until needed. 

Maybe it has something to do with my distinct lack of hand-eye coordination, but when making these I discovered I am completely useless at rolling things into ball shapes. Hence, these were more of squashed spheres. But that just adds to the authenticity really, doesn't it? I hope Edd would agree. 

These would make a perfect gift, just like my Fresh Blueberry Marshmallows!

Sunday 30 June 2013

Pistachio & Lime Cake


This cake forms the impressive front page of my new favorite book: "The Clandestine Cake Club Book". Needless to say, it looks wonderfully impressive, and I couldn't not attempt to replicate it.

When I rang my Nan up to ask if she needed a birthday cake for her big day on Sunday 30th, she jumped at the oppurtunity. Just another excuse for a Matthews family get together really! Drinking tea and eating cake is what we do best.

I am an absolute pistachio fiend, another reason why this recipe leaptoff the page at me. One of my main memories of summer holidays with my family in France is bags full of the things, spending hours and hours cracking their shells off and munching away with my Dad. The pistachios added a lovely crunchy texture in between mouthfuls of soft sponge and creamy lime frosting.

Ingredients:
For the sponge:
300g butter
300g caster sugar
5 eggs
300g self raising flour
1 tsp baking powder
grated zest of 3 limes, plus the juice of 2
50g pistachio nuts, finely chopped
Lime syrup:
juice of 2 limes
2tbsp caster sugar  
*NB - This is the amount given by the recipe. If I were to make this cake again, I'd     make double the amount of syrup, as it was just so zesty and scrummy*
Lime curd:
60g butter
2 eggs
170g caster sugar
grated zest and juice of 3 limes
Frosting and decoration:
250g butter
200g full fat cream cheese
grated zest of 1 lime
250g icing sugar
75g good quality dark chocolate
125g pistachio nuts

Method:
Preheat the oven to 190 degrees Celsius (170 fan) and line three 20cm round sandwich tins.

Beat the butter and sugar until light and fluffy.


Add the eggs one a a time, beating well after each addition. Fold in the flour and the baking powder until thoroughly combined. Add the lime zest and juice and the finely chopped pistachios and mix until well combined.


Divide the mixture between the tins, spreading evenly. Bake for 25-30 minutes. Leave in the tins to cool slightly.


Meanwhile, make the syrup. Put the lime juice and sugar into a pan over a low heat and stir until the sugar has completely dissolved, then turn up the heat until the mixture simmers. Remove from the heat and leave to cool.

While the sponges are still warm turn them out of their tins onto a wire rack. Spoon the lime syrup over the top of each. Leave the cakes to cool completely.

Put all the ingredients for the lime curd into a small, heavy based pan. Heat gently, stirring constantly with a wooden spoon - don't let the mixture boil or the eggs will scramble. When it has thickened enough to coat the back of a spoon, strain through a sieve into a bowl. Cover and leave to cool.


To make the frosting, beat the butter until smooth. Add the cream cheese and mix until combined. Add the lime zest, then beat in the icing sugar.


For the decoration, melt the chocolate in a bowl set over a pan of gently simmering water. Pour the melted chocolate onto a sheet of baking parchment and spread it out with a palette knife so it is about 3mm thick. Scatter over some chopped pistachios and leave to cool and set.


To assemble the cake, place one of the cooled sponges on a plate, spread with a third of the frosting, then cover with a generous layer of he lime curd. Add a sprinkling of pistachio nuts. Repeat with the next layer, and then place the final cake on top and cover with the remaining frosting. Feed the remaining curd to a willing recipient, ie your Mum.


Break the pistachio coated dark chocolate into rough shards and scatter these over the top of the cake.


Here's my beautiful Nanny slicing into her birthday cake in her back garden. Needless to say, it went down very well; my Auntie Chris devoured two slices and i'm pretty sure Nan snaffled the rest of the cake away too eat herself this evening.