Thursday, 25 April 2013

Fresh Blueberry Marshmallows


I've always wanted to make marshmallows, but never quite had the confidence until I spotted this simple little recipe in Edd Kimber's new book "Say it With Cake":

425g caster sugar
1 tbsp liquid glucose
8 sheets of gelatin
2 large egg whites
150g blueberries
50g icing sugar (for the coating)
50g cornflour (for the coating)

Lightly grease a 23 x 33cm baking tray, then line with a piece of clingfilm and lightly grease the clingfilm. To make the coating, mix the icing sugar and the cornflour together and dust the clingfilm with a thin layer of this mixture. Reserve the remainder.

Put the sugar, glucose, and 125ml of water into a medium pan over a medium heat. Bring to the boil and have a sugar thermometer ready.

Meanwhile, but the gelatin into a medium bowl and cover with 150ml cold water.

Put the egg whites into a clean bowl and when the syrup in the pan reaches about 115 degrees Celsius, whisk them until they form soft peaks. Cook the syrup until the thermometre registers 118. With the egg beater still running, pour the syrup in a slow stream down the side of the bowl containing the whites.

Put the softened gelatin and the water into the now empty pan over a low heat, then stir until the gelatine is fully melted. Pour this into the meruinge mixture and continue whisking until the mixture is cool.


Pour half the mixture into the prepared tin and sprinkle over the blueberries. Top with the remaining mixture. Leave to set at room temperature for a few hours.


Once fully set, tip the marshmallow out onto a sheet of baking paper and cut into small squares using either a pizza wheel or scissors. Roll in the remaining coating.


I divided the marshmallows into two cute little food bags, tied them with ribbon and attached gift tags to give to my friends for their birthdays :) What more could you want!?

Saturday, 20 April 2013

Rhubarb and Custard Muffins


As a child, I remember the most exciting thing about going to town with Mum was visiting the pick and mix. My eldest sister would always get pineapple rock, but I always chose rhubarb and custard sweets.  There's nothing quite as retro I find quite as nostalgic as sucking on one of these little boiled sweets today.

My love of these flavours has almost "matured" you could say as I now go absolutely crazy for rhubarb, I adore the stuff. And custard.. well, anyone who has ever sat in Lincoln College's hall with me at pudding when crumble is served with huge jugs of hot custard, will know that I can very easily eat the stuff by the spoonful. Custard is the food of the God's.

And what more could a rhubarb-loving custard fiend want other than these rhubarb and custard cupcakes?

I took these back to sunny sunny Oxford with me, and i'm pretty sure they were appreciated!


So happy to be back, even if it means no baking for a while...
The recipe is from BBC Good Food, and is as follows:

1 quantity Barney's roasted rhubarb (see recipe, below method)
250g pack butter , softened, plus extra for greasing
150g pot ready-made custard (not the chilled kind; I used Ambrosia)
250g self-raising flour
½ tsp baking powder
4 large eggs
1 tsp vanilla extract
250g golden caster sugar
icing sugar , for dusting

"Barney's roasted rhubarb": Heat oven to 200C/fan 180C/gas 6. Rinse 400g rhubarb and shake off excess water. Trim the ends, then cut into little-finger-size pieces. Put in a shallow dish or a baking tray, tip over 50g caster sugar, toss together, then shuffle rhubarb so it's in a single layer.


Cover with foil, then roast for 15 mins. Remove foil. Give everything a little shake, roast for 5 mins more or until tender and the juices are syrupy.

Heat oven to 180C/fan 160C/gas 4. Line a muffin tin with cupcake cases.

Reserve 3 tbsp of the custard in a bowl. Beat the rest of the custard together with the butter, flour, baking powder, eggs, vanilla and sugar until creamy and smooth.


Spoon a small tablespoon of the mixture into the cupcake cases. Add a piece of rhubarb, a blob of custard then another tablespoon of the mixture. Repeat. On top of each cupcake, place a small dollop of custard. 

Yep I forgot to take another picture once they were complete...
Bake in the preheated oven for 20-25 minutes, until risen and golden.


The custard on the top will go quite brown, but don't worry this doesn't mean they're burnt :)

For more summery recipes, see my passionfruit cake and strawberry jam cupcakes!

Monday, 15 April 2013

Tash's Red Velvet Cake


In a post not so long ago I mentioned my most recent challenge: baking the perfect red velvet cupcake for the lovely Natasha. Last term, my college at Oxford had an "Auction of Promises" in aid of our charity Vacation Project, and I promised Tash a freshly baked cake of her choice.

Unbeknownst to me however, Tash wanted a red velvet cake. A cake I had vowed never to make again due to baking failures in the past.

However, i've spent my Easter Vacation very productively; attempting to create the perfect red velvet cake. And I have to say (although we'll leave the final judgement to Tash herself), I think I managed it!

I used the Hummingbird Recipe but tweaked and amended it a little, here it is:

120g unsalted butter
300g caster sugar
2 eggs
20g cocoa powder
1/2 tsp red food colouring gel
Tsp vanilla extract
240ml buttermilk
300g plain flour
Tsp bicarbonate of soda
3 tsp white wine vinegar

600g icing sugar (for the cream cheese icing)
100g unsalted butter (for the cream cheese icing)
250g cream cheese (for the cream cheese icing)

Preheat the oven to 170 degrees Celsius. Grease two large cake tins (approx 23cm)

Put the butter and the sugar in a bowl and beat together until light and fluffy. Add the eggs and beat well. Add the vanilla extract.

In a jug, mix the food colouring gel into the buttermilk. Leave to the side. Sift together the flour, cocoa powder, and bicarbonate of soda.  Pour the buttermilk into the egg and sugar mixture, and beat well. Next, sift in the flour and cocoa powder. Beat well, until you have a smooth, even mixture. Add the white wine vinegar and beat again.


Divide the mixture evenly between the two cake tins and bake in the preheated oven for 25 minutes, until a skewer inserted into the cakes comes out clean. Leave the cakes to cool slightly in their tins before turning out onto a wire cooling rack to cool completely.


Make the cream cheese frosting: Beat the icing sugar and butter together, then add the cream cheese and beat until well incorporated. Do NOT over-beat, as the mixture can become runny quickly.


When the cake is completely cool, ice it with the cream cheese mixture, sandwiching the two layers together and icing the top and sides as you please.

Another impressive cake from the Hummingbird Bakery book is this carrot cake!

Sunday, 14 April 2013

Millionaire's Shortbread


Tomorrow is Monday 15th, which can only mean one thing: returning to Oxford tomorrow, wahoo!

One of the reasons I get so excited about going back to University is that it gives me a HUGE excuse to bake. And by "huge", I mean a large group of hungry students. aka. my lovely friends.

So today has been reserved for a bake-a-thon for a very long time, and this is only the first of many more posts about what I shall be taking back with me for them all to indulge in before the carnage of Trinity (summer term) and prelims (exams, *gulp*) begins.

Last term, I "pidge loved" one of my good friends Boo a slice of millionaires shortbread. ("Pidge loving" means putting something yummy/sweet/generally nice in a friend's pigeon hole, where their post is put by the college porters.) A few hours later I received a very enthusiastic text from Boo, exclaiming that millionaires shortbread was her "favorite thing ever!" And obviously, due to my undying love and devotion to Boo, I decided to bake it for her :) Here's a picture, just to help you visualize this anecdote:

Lovely, isn't she?

Anyway, here's the recipe:

200g butter (For the shortbread)
150g caster sugar (for the shortbread)
300g plain flour (for the shortbread)

300g butter (for the caramel)
140g caster sugar (for the caramel)
75g golden syrup (for the caramel)
397g can condensed milk (for the caramel)

200g dark chocolate
100g milk chocolate
200g white chocolate

Preheat the oven to 170 degrees Celsius. Lightly butter a Swiss roll tin measuring about 30cm x 20cm.

Combine the shortbread ingredients in a bowl and blend to a smooth dough. Press the dough into the prepared baking tin and prick it all over with a fork. Bake for 15-20 minutes until it is golden brown and firm. Remove from the oven and set aside to cool.

Pre oven before I tidied it up.. 
Make the caramel: combine the butter, sugar, syrup and condensed milk in a saucepan. Stir over a low heat until the butter has melted. Simmer gently for 20 minutes, stirring constantly, until the mixture looks like thick caramel fudge. Resist eating it all straight from the pan. Pour over the cold shortbread in an even layer and leave to cool.

Mmmm.. calories...
Mmmm... Melted calories...
Mmm.. brown melted calories...
Mmm... brown melted calories in a tin...
Melt the chocolate in a heatproof bowl set over a pan of gently simmering water, then pour the chocolate over the caramel layer, spreading it evenly with a palette knife. Melt the white chocolate in a heatproof bowl over a pan of simmering water. Pour into a piping bag, snip off the end, and drizzle over the millionaires shortbread.


Leave to cool, then cut into squares with a sharp knife. Makes approx 15 squares, or 18 slightly smaller ones :) My Best Ever Triple Chocolate Brownies also make an amazingly indulgent treat.

Thursday, 11 April 2013

Good News!


I'm quite new too this whole blogging malarky, and still having quite gotten to grips with how it works, but I was thrilled to recently find out that the lovely Kat has nominated my blog for an award :) Thanks Kat!

The "versatile blogging award" works as a kind of "pass it on" to your favourite blogs system, I have to now nominate ten of my favorites and list seven things about myself.

So, i'm not that interesting, but here we go...

1) I live in a beautiful area of the British countryside called Herefordshire; it can be a little boring here sometimes, but it truly is a stunning area, and I often have to remind myself how lucky I am to have been bought up surrounded by such a landscape.

2) I study English Literature at Oxford University at Lincoln College, I am in my first year. Before I got into Oxford, I had wanted to study there for a very very long time. Every day when I walk through one of Lincoln's stunning 15th century quads, I feel blessed and privileged to study in such an amazing place.


3) I have three older sisters - yes, i'm the baby of the family. They are called Ella, Sophie and Anna, and they are my favorite people on the entire people. We're all incredibly different, but at the same time, incredibly similar. I truly do not know what life would be like without sisters, they are marvelous creations! 

4) My oldest sister Anna has just had a beautiful baby boy called Sam with her husband Mark, so I am proud to say I am an Auntie! Meeting my nephew for the first times was one of the most magical moments of my life, and I can't wait to watch him grow up and spoil him to pieces.


5) If you ask me what I want to be when I grow up, i'll probably say "Be Mary Berry." That is the only way I can accurately describe what I can do; write cook books, teach cookery, and generally share my adoration of baking with the world.

6) My best friend (and baking buddy) has four legs and a tail. Well, a stump. He's called Gus, and he's a cocker spaniel. The most handsome cocker spaniel in the entire world. What I miss most when at University, besides from baking, is curling up on the beanbag infront of the stove with Gus cuddled up on my lap. He's so loyal and the most chilled out, sweet-natured dog. It doesn't matter to me that he's shaped a bit like a donkey, he barely has a tail, his legs are short and he gets very very fluffy. He's perfect.


7) Besides from baking, I also love scrapbooking. I have five scrapbooks which detail the last five or six years of my life, right back to my very first years of high school. Scrapbooking reminds me just how lucky I am to live my life, how I have an amazing family, incredible friends, a down-right awesome education, my health (although admittedly, I get ill a lot), a roof over my head and a talent for two things I absolutely adore; literature and baking. 


Now time to nominate my favorite blogs! I would like to nominate:

Sweetharts Cakes and Bakes
Bake or Break
The Brown Eyed Baker
The Baking Fairy
The Very Hungry Baker
Vagabond Baker
Vanilla Sugar Blog
The more than occasional baker
The Baker Chick
Rhubarb & Rose

These blogs are really lovely and have inspired me endlessly. Making a baking blog is probably going to have turned out to be the best thing that's ever happened for my friends; I want to bake now more than I ever did before.

Wednesday, 10 April 2013

Rye, Ale and Oat Bread

It's only five days before my return to Oxford, so in the meantime I'm trying to get as much baking in as physically possible. Unfortunately, five days til Oxford means only TEN days until collections (exams that we have at the beginning of every single term).

Consequently, this bread was made in between long sessions sitting at my desk revising Old English heroic poetry. It seemed quite apt, whilst writing about Anglo Saxon culture and customs, to be making a bread out of rye and ale.

According to my brand new favorite thing (The Oxford Companion to FOOD) rye cultivation entered Europe around 2000BC. When the Anglo Saxons invaded England, they bought rye with them, and for a long time more rye was grown in Britain than wheat.

This recipe uses the traditional combination of rye and strong white flour, mixed with a local Herefordian ale: Butty Bach (Welsh for "little boy" - i'm a font of knowledge today.)


Personally, I think all beer/ale is repulsive, but my Dad requested this bread from Paul Hollywood's new book and it really is absolutely delicious. I'm a total newbie at bread making, and had a minor hiccup towards the end of baking... Here's the recipe:

350g rye flour
150g strong white bread flour
10g salt
10g fast action dried yeast
50ml black treacle
140ml cool water
250ml full flavoured ale
Olive oil for oiling
Also - 150ml ale (for the topping)
100g rye flour (For the topping)
Pinch of caster sugar
50-75 jumbo oats

Mix the rye and the white flours together in a bowl and add the salt to one side of the bowl and the yeast to the other. (You have to do this otherwise the salt kills the yeast.) Add the treacle, 100ml of the water, and 200ml of the ale. Use the fingers of one hand and a clawing action to bring the ingredients together. Continue to add the remaining ale and water, a little at a time, until you have a soft, sticky dough. You may not need all the liquid but try to add as much of it as possible. Rye flour needs more liquid than white wheat flour. (I used all of the ale but didn't use about 50ml of the water.)


Pour a little oil onto the work surface and place the dough on it. Knead the dough for 5-10 minutes. It will become less sticky as you knead it and turn into a smooth ball with an elastic texture.

Modelling my dressing gown sleeve..
When the dough is smooth and stretchy put it into a lightly oiled large bowl, cover with clingfilm or a tea towel, and leave to rise until doubled in size. This will take longer than white bread; possibly as long as 4 hours.
Pre rise bread
Meanwhile, make the beer batter topping. This helps form a crust and enhances the appearance and flavour of the bread. In a bowl, mix the ale and rye flour and sugar to form a smooth paste. Leave to the side.

No, this is not porridge..

Post-rise dough
Tip the risen dough out onto a lightly floured work surface and knock it back by folding it repeatedly in on itself to gently push out the air until it is smooth. Flatten the dough out into a rough rectangle with your hands, then roll it into a thick oblong. Fold the 2 shorter ends in towards the centre and press them down to get a chunky squarish shape. Turn the dough so that the fold is underneath. Shape the dough into a ball.

Spoon the beer batter on top of the loaf and smooth it gently with your hands to form a thick, even layer. Sprinkle with oats and dust with flour. Place the loaf on a baking tray, lined with baking parchment or silicon.

Shaped dough, ready to rise
Shaped loaf
Leave the bread to prove again until doubled in size, about 1 and a half hours. Pre heat your oven to 220 degrees Celsius. This is where it all went wrong for me. I went from having the beautifully shaped loaf above to having... well.. an accurate description, would be a frisbee:

Frisbee loaf!
Place the loaf in the centre of the oven and bake for 25 minutes. Then lower the oven to 200 degrees Celsius and bake for a further 10 minutes until the loaf is golden brown and sounds hollow when you tap the base. Transfer to a wire rack and leave to cool.


I'm not sure why the frisbee effect happened, I think the place I proved it in may have been too warm for the yeast to cope with. If Paul Hollywood, or any other bread experts happen to be reading this, do let me know. Despite the rather odd shape though, the flavour of this bread is sublime, and its amazing with chutney and cheese.

*Happy Baking*

Tuesday, 9 April 2013

Chocolate Marble Cake

WARNING - IF YOU ARE ON A DIET, AVERT YOUR EYES NOW.


Don't be deceived, it's not a giant party ring biscuit. It is, in fact, Mary Berry's marbled chocolate cake; gloriously decadent, and perfect for a birthday party or genuinely just to impress your friends.

Unfortunately I didn't take a photo of the cake after it was sliced, but the effect inside is brilliant. Splodging the cake mixture around the tin, then adding chocolate cake mixture in dots on top and swirling them together, leaves you with a stunning marbled effect - everyone will think you're a baking genius when really it's quite simple :)

225g softened butter
225g caster sugar
4 large eggs
225g self raising flour
2 level teaspoons baking powder
1 and 1/2 level teaspoons cocoa powder
1 and 1/2 tablespoons of hot water
150g plain chocolate (for the icing)
2 tablespoons water
100g butter
50g belgian milk chocolate OR white chocolate (Mary uses milk for the drizzle, but I think white looks more impressive!)

Preheat the oven to 180 degrees Celsius (Fan 170). Grease a 1.75 ring mould.

Measure all the cake ingredients, except the cocoa and water into a large bowl. Beat until thoroughly blended. Dot about half of this mixture, in teaspoons, into the base of the prepared tin.

Mix the cocoa and hot water together in a small bowl then mix into the remaining cake mixture. Dot this mixture over and between the cake mixture already in the tin. Swirl a little with a knife, then carefully level the surface.

Bake in the preheated oven for about 40 minutes or until well risen and the top of the cake springs back when lightly touched. Leave to cool in the tin for a few minutes then transfer to a wire rack to cool completely.

To make the icing, break the plain chocolate into pieces, then melt it gently with the butter and water in a bowl over a pan of simmering water. Pour over the cake and then leave to set for about 1 hour. Break the white or milk chocolate into a bowl and melt over a pan of simmering water. Spoon into a piping bag, snip off the end, and drizzle the chocolate over the cake. (It is worth putting a sheet of greasepoof paper under the cake when you ice it, to save making a mess of the kitchen sides!)

*Happy Baking*

PS. Choc-a-holic? Whip up a batch of my Best Ever Triple Chocolate Brownies or Millionaire's Shortbread.

Monday, 8 April 2013

Salted Caramel "Surprise" Brownies


Salted caramel is a huge craze at the moment, and i'm all for jumping on the band wagon and going along with it when it comes to something this delicious. Today, in honour of a get together with old friends for a 19th birthday, I made Edd Kimber's Salted Caramel Brownies. Delicious fudgy chocolate brownies with a layer of sweet and salty caramel baked into the middle - bite size heaven. The recipe for these can be found on Edd's blog here.

However, as I was making these, I had a few baking mishaps which turned them into salted caramel "surprise" brownies; the reason for which will soon become obvious. Here's the recipe:

Salted Caramel Filling
175g caster sugar
150ml double cream
10g unsalted butter
large pinch of flaked sea salt

Fudge Brownies
180g plain flour
3 tbsp cocoa powder
1/4 tsp salt
300g dark chocolate, around 65-75% cocoa solids
150g unsalted butter
220g light brown sugar
150g caster sugar
4 large eggs
1 tsp vanilla extract

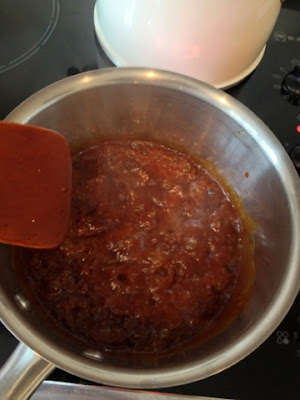
To make the caramel, heat the sugar in a medium pan over a medium heat until it is browning and melting around the edges - make sure to cook it far enough – it should look like the colour of an old penny. Pour in half the cream and all the salt, be careful the mixture will bubbly up violently.


The melted sugar
Once the mixture has calmed down pour in the remaining cream followed by the butter, if there are any lumps place the pan back on the heat and stir until smooth. Take off the heat and allow to cool and then pour into a squeeze bottle (this makes it easier to spread the caramel later).*I didn't use a squeeze bottle, just poured it into a jug and used the jug to pour it evenly over the brownie mixture*

After the cream has been added.
For the brownies preheat the oven to 180°C/160°C fan. Grease a 9×13 light coloured pan and line with a strip of parchment leaving about a 2-inch overhang along the long edges to make removing the brownies easier. Sieve the flour, cocoa powder and salt together into a medium bowl and set aside. 

Place the chocolate and butter into a heatproof bowl and set over a pan of simmering water, making sure the bowl doesn’t touch the water, and stir occasionally until the mixture is fully melted. Take the bowl of the heat and add the eggs, sugars and vanilla and beat until the mixture is smooth. Sieve over the flour mixture and gently fold together.  

*This is where I went a little wrong. It is advisable, to CHECK the bottle of vanilla essence you take out of the cupboard is actually vanilla essence.... not almond essence. Hence the "surprise" of these brownies is that they are also slightly almondy, due to me not checking the label on the bottle first! Oops!*


Divide the mixture equally in half and spread out the first half into the prepared tin. Using the squeeze bottle pour the caramel over the batter leaving a 1 1/2 cm border around the outside. You now need to spread the remaining batter over the caramel and this bit can be a little tricky. Edd suggests using a piping bag to pipe the remaining brownie mixture evenly over the top of the caramel, but I simply draped it over straight from the bowl and this worked nicely.

Ready for the oven
Bake in the preheated oven for 25-30 until the a skewer inserted into the middle comes out with just a few moist crumbs attached, you don't want raw batter. Allow to cool completely before using a sharp knife to cut into squares. *I found that the brownie actually took closer to 40 minutes to bake properly*

Out of the oven - if only you could smell a picture...
Makes 15 perfect squares of oozy gooey goodness :) (12 if you fancy a slightly  bigger brownie.)
It just goes to show that no matter what your baking experience, everyone has a mishap occasionally, and these still tasted yummy despite being a little.. err.. nutty. It reminds me of a time many Hereford friends will remember when my Mum accidentally drizzled Vanilla Syrup all over pizzas (instead of olive oil) before cooking them!

Happy Baking! x